i believe every quilt should have a label. why? because, by nature, quilts are family treasures that are passed down through the generations. one hundred years from now, the owner of your quilt will be wondering about its history. some folks think there are different ways to make a quilt label, but in my world, there is only one right way. hand embroidered.
when i made my first quilt, i searched the internet for some clues on how to make a quilt label, but i did not find any information on creating embroidered labels. hence, a few years later, here is my step-by-step guide to making a hand-embroidered quilt label. note: the pictures for this tutorial were taken when i was making a label for a newborn baby's
good wishes quilt - all names have been obscured to protect the
innocent.
materials:
- piece of fabric about 12"x12": you can use fabric from the quilt or a solid color. i like to use unbleached cotton muslin
- piece of fusible interfacing that is 1/4" wider and longer than your desired label: if you are planning a 4"x4" label, you need a piece of interfacing that is 4.25"x4.25"
- iron
- label plan: see step 1.
- disappearing ink pen - you can use the washable ink, fine point markers available in sewing stores, or you can use the pilot frixion erasable gel pen (fair warning-this one is not made for fabric, but i love it)
- hand-sewing needle
- embroidery floss/thread
- embroidery hoop
- scissors
- a little piece of cardboard (i used the cardboard from a cheerios box)
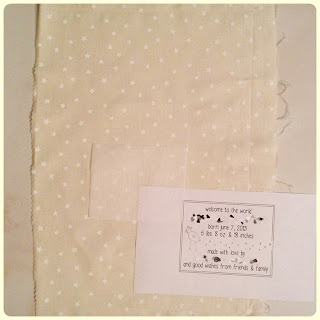

step 1. plan your label. on paper. you can hand write it, but i am a perfectionist, so i create my plan on the computer and print it out. if you choose this
method, be sure to use a simple, easy-to-read, sans serif font. i like
to use handwriting fonts. if you want to add any designs, like chickens with ears, you should include them on your label plan. borders are optional. you can include any information you want, but at the very least, you should put your name and the date you made the quilt. you can also give your quilt a name, or if it is a gift, you can include the name of the recipient and the occasion. the sample below is my standard format for newborn baby quilts.
step 1. iron the fusible interfacing onto the back of the fabric. it should be in the center of the fabric.
step 2. tape your label plan on your light table. my light table is my sliding glass door. fancy, eh? please ignore the mess that is outside.
step 3. tape your fabric over the label plan, interfacing side down.
make sure your label is centered directly under the interfacing.
step 4. use your disappearing ink pen to carefully trace all letters and designs. if you have straight lines to trace, use a ruler. seriously. you can thank me later.
 |
| trace the letters and designs. |
 |
| use a ruler to trace any straight lines. |
step 5. put your fabric into an embroidery hoop. make sure the fabric is tight.
step 6. cut a length of embroidery thread. you want to cut it long enough that you do not have to constantly take new thread, but not so long that it is constantly tripping all over itself. i typically cut about 36". now that you have your chunk of thread, check it out. notice it has 6 strands? great. separate it so you have three sets of 2 strands. find your little chunk of cardboard and cut a little (1/4") slit on each side. wrap two of the 2-strand chunks around the cardboard, securing the ends in the little slits. pick a needle with which you want to sew (make sure the eye is large enough to fit your thread, but not much larger) and thread it with the third strand.
 |
| 6 strands. |
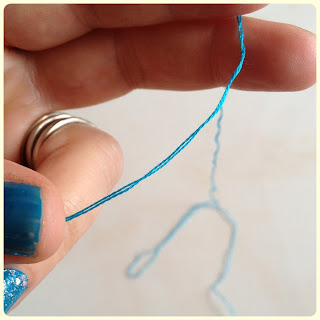 |
| 2 strands. |
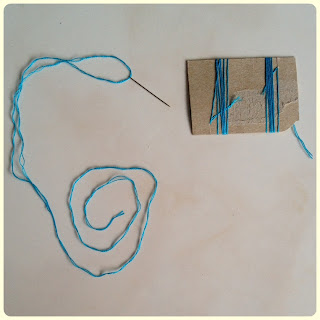 |
| 1 chunk on the needle and 2 chunks waiting on the cardboard. |
step 7. use a basic back stitch (instructions
here) to carefully stitch the letters, designs, and border. use as few stitches as necessary to make each letter. now, i am not saying to be frugal, but also, do not use thirty-seven stitches to make one letter. if your fabric starts to get slack, stretch it over the hoop again. when you stretch the fabric over the hoop, it could make your straight lines look wonky. make sure your stitches follow the line, no matter how wonky. trust me. when you take it out of the hoop, the fabric will no longer be stretched and everything will once again look straight.
 |
| the requisite mid-sew picture. |
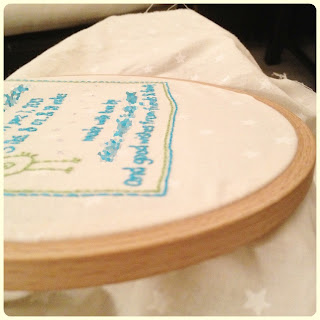 |
| wiggly lines, because the fabric is stretched in the hoop. |
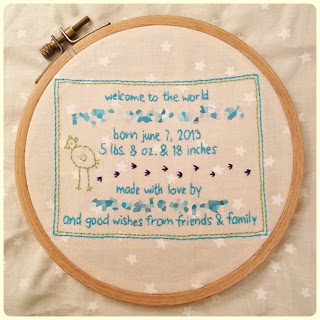 |
| finished! |
step 8. trim the fabric, leaving about 1/2" around the label. fold the edges to the back and iron. (my apologies, i forgot to take a picture of that step.) finally, sew the label onto the quilt. i attach the label to the back of my quilt, after my quilt is completed. you can also attach it before you make your quilt sandwich; however, if you do this, keep in mind that your quilting stitches will go across the label. i like to use my machine to top stitch around the the edge of the label. yes, the stitches show through on the other side of the quilt. if you do not want the stitches to show through, then you either need to attach the label before making the quilt sandwich, or you can hand stitch it onto the back of the quilt making sure your stitches only go through the first layer of the quilt. congratulations, you have a beautiful handmade quilt label!
 |
| the label attached to the back of the quilt. notice all the lines that were wiggly in the hoop are now straight. |
 |
| the quilt folded up and tied with a ribbon. i like to fold it, so that i can fold back the edge to display the label. |


